|
|
black chrome
|
 |
|
Create a background and type and Layer >
Rasterize Type.
|
 |
|
Cntrl + click on the type layer to make it a
selection. Select > Save Selection. Access the Channels pallet,
click on the Alpha Channel and access Filter > Blur >
Gaussian Blur (2.5 should do it).
|
 |
|
Back at the Layers Pallet: make sure the type
layer is active. Filter > Render > Lighting Effects. Make sure
"Alpha 1" is chosen from the drop-down menu.
|
 |
|
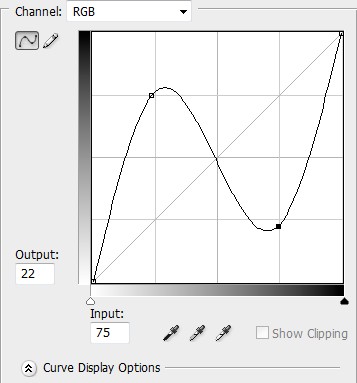
Image > Adjustments > Curves. The first
curve is shown here; feel free to experiment on what looks best to
you.
|
 |
|
After our first curve adjustment has been
implemented. Still some work to do...
|
 |
|
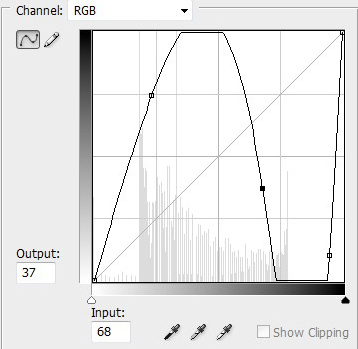
It becomes lightly tricky with curve adjustment
number two. Three points have been created here and much of the
final result is going to depend on the size, type and color of the
chosen font.
|
 |
|
Our (nearly) final result looks cool---and has
that blackish tinge, to be certain.
|
 |
|
Since there are a few jaggies present (difficult
to avoid completely), the blur tool is utilized to smooth out some
of the rougher edges.
|
|
| 


