|
|
photo window
|
 |
A tutorial guaranteed to test your patience---but worth it. We'll start off our photo holder tutorial with a
325 x 325 image and use the Gradient Overlay settings below. Be sure to turn the background into a layer.
|
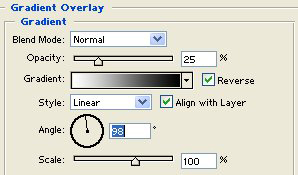 |
Gradient Overlay: Blend Mode > Normal, Opacity > 25%, Style > Linear, Angle > 98.
|
 |
Utilize the Rounded Rectangle Tool (make sure "Fill Pixels" option is highlighted on the toolbar) and draw a
selection onto the new layer you just created.
|
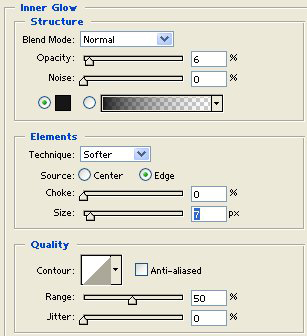 |
Inner Glow: Blend Mode > Normal, Opacity > 6, Technique > Softer, Source > Edge, Size > 7.
|
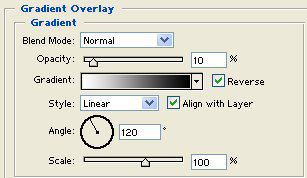 |
Gradient Overlay: Blend Mode > Normal, Opacity > 10, Style > Linear.
|
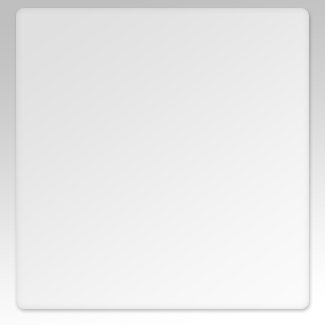 |
The holder is starting to take on a more intriguing look and shape, thanks in due part to the gradient overlay settings.
|
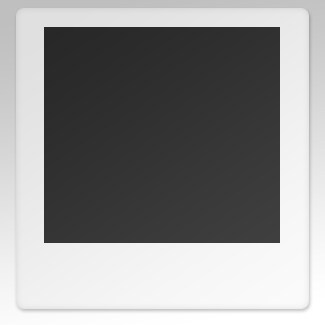 |
Create a new layer, access the Rectangle Tool and draw a selection. Color hardly matters at this point, for we will
fill in the rectangle with a photograph in short order.
|
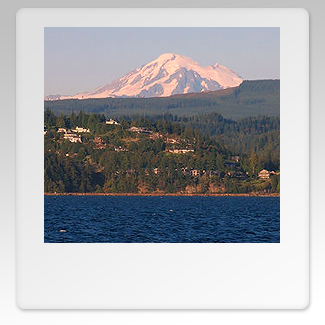 |
Open an rgb image, Select > All and copy and paste it into the layer containing the rectangle selection. You can
use the Move Tool (Cntrl + V) to center the image.
|
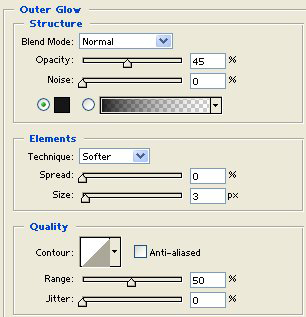 |
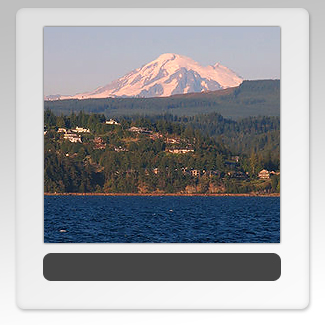
To create a subtle glow around the edges of the image, access the Layers Palette and Outer Glow: Blend
Mode > Normal, Opacity > 45%, Color > #161616, Size > 3.
|
 |
DThe holder to this point is starting to look better with Mount Baker as the backdrop and a slight glow to the image.
|
 |
Add another layer and utilize the Rounded Rectangle Tool once again to draw a selection for text. And now: sprucing
up the selection with some styles.
|
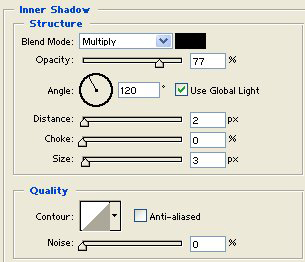 |
Inner Shadow: Blend Mode > Multiply, Opacity > 77%, Distance > 2, Size > 3.
|
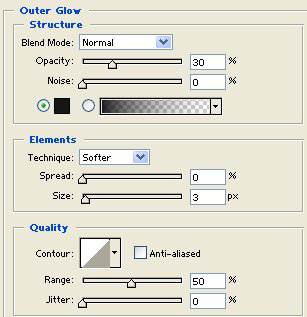 |
Outer Glow: Blend Mode > Normal, Opacity > 30%, Color > #161616, Technique > Softer, Size > 3.
|
 |
Ready to add text, but first...
|
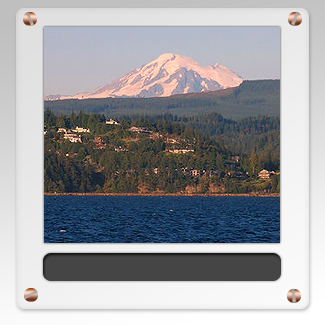 |
For a visually stunning effect (ahem), screws are added to further affix the photo holder. Easy to make, however,
that tutorial is for another time.
|
 |
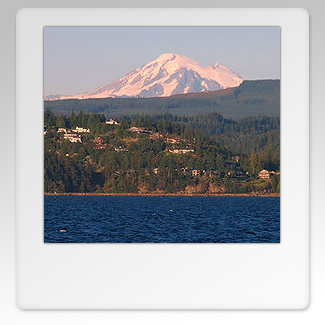
The final result, with Mount Baker outside Bellingham, Washington as the focal point.
| |
|


