|
|
glass type
|
 |
|
The first "Glass Type" pagerunners tutorial. At
left is the finished product. Heads up: you may use curves to
achieve the final result, however, in this tutorial we have used a
"Glass Contour" setting.
|
 |
|
Open a new RGB document and create and position
your text.
|
 |
|
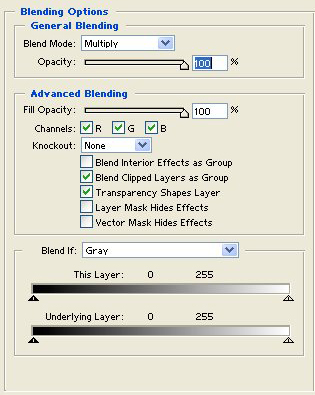
The second step is to access Blending Options
from the layers pallet. Make sure the blending mode is set to
multiply. Initially, your type will be almost completely
transparent, though we will soon see better results.
|
 |
|
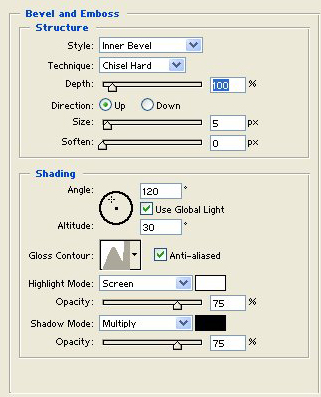
Under Bevel & Emboss, choose the settings
Inner Bevel and Chisel Hard. Make sure Anti-Alias is checked. Choose
the new Glass Contour option.
|
 |
|
After the Blending Options and Bevel & Emboss
settings are applied. To add a bit of a fancy touch, utilize the
Stroke option.
|
 |
|
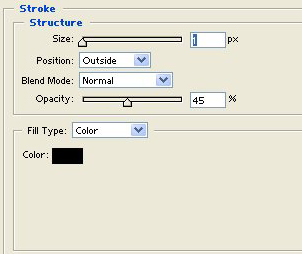
For Stroke, size 1 and black or other dark color
(try #660000 or #000033). Lower the opacity to 45%.
|
 |
|
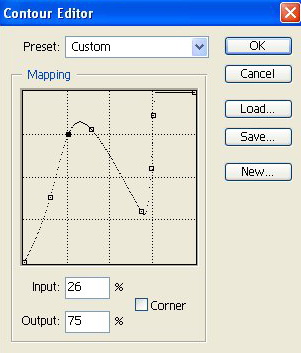
If you don't wish to download the glass contour
or simply want to use some curves yourself, the map is shown at
left.
|
 |
|
If you wish to go the fancy route, add the
following settings: in the layers palette, choose Satin with the
Blend Mode set to Multiply, opacity lowered to 40% and the Glass
Contour utilized once again. Check the Anti-Alias box. Now a bit of
indentation is added to the glass text.
|
|
| 


