|
|
web buttons
|
 |
Create a new document about 175 pixels x 50 pixels---large enough to have a nice sized working area for
one button. Add a new layer. Change your foreground color to black. Use the Rounded Rectangle Tool and set the feather radius to "4." Draw a black
rectangle around 150 x 50.
|
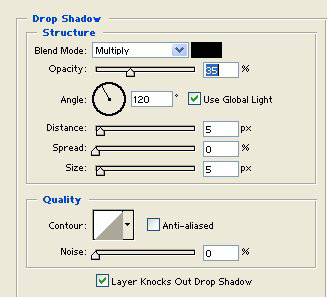 |
With your button layer selected, go to Style > Drop Shadow with the above settings, Blend Mode > Multiply,
Opacity, 35%, Distance > 0, Spread > 0, Size >5.
|
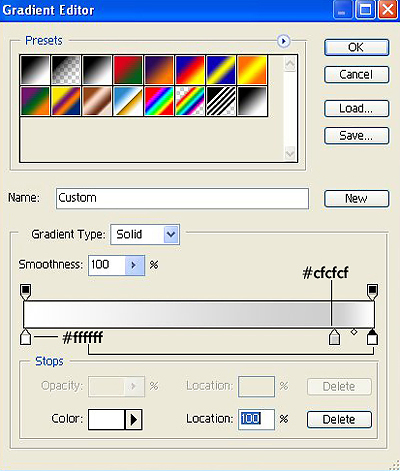 |
Go to Style > Gradient Overlay with the above settings. Double click on the gradient bar to change the
color stops. At the far left bottom stop, double click and change the color to #ffffff. Double click anywhere at the bottom of the gradient bar and add
another stop. Move it almost to the right side bottom stop, double click and change the color to #cfcfcf. At the far right bottom stop, change the color
to #ffffff.
|
|
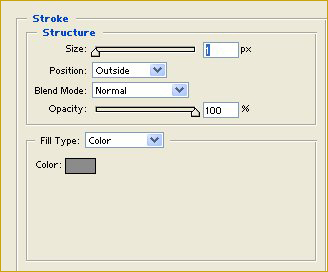
Layer Style > Stroke is next. Change the default color to #8b8b8b. Size at 1, Blend Mode > Normal, Position >
Outside.
|
 |
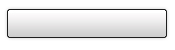
The web button with the gradient and stroke applied. Create a new layer. Use the pencil tool to draw a line
from the near top of the button to the bottom. Lower the opacity of this layer to 50%.
|

|
After the text is added, we'll finish it off with a arrow to the left of the text. Use the polygon tool,
set the sides to 3 in the Options Bar and use it to add the navigation button.
| |
|