|
|
chrome type
|
 |
|
Create and position your text. Control + A to
make the text a selection. Under the Select Menu,choose Save As
Selection and click OK. Now drag your type layer to the trash icon
to delete it.
|
 |
|
Go to the Channels Pallet and click on the Alpha
Channel. Filter > Blur > Gaussian Blur at a setting of 2 works
well. Go back to the Layers Pallet and click once on the background
layer. Access Filter > Render > Lighting Effects and at the
bottom of the menu, click on Alpha One to load that channel.
|
 |
|
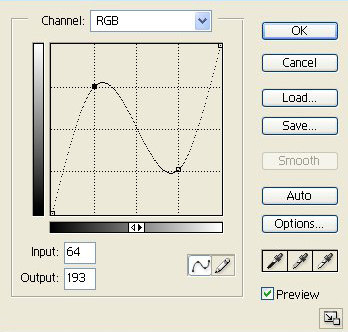
Under Image > Adjust > Curves, create a
representation close to what you see here.
|
 |
|
Access Select > Menu and load the selection.
Choose Alpha 1 from the pop-up menu and click OK. Under the Select
Menu, choose Modify > Expand and choose 2 or 3 as your setting
(to reach the end of the text bezel).
|
 |
|
Next, Control + Shift + J to put the text on its
own layer. Select > Inverse and delete the background layer.
|
 |
|
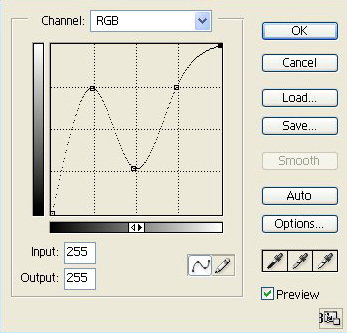
For a better chrome effect, access Image >
Adjust Curves until you have what you see here.
|
 |
|
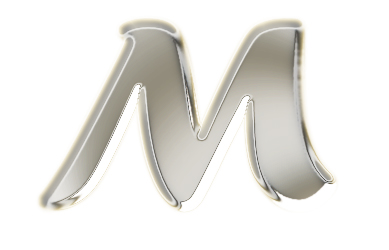
Looks a bit nicer, to be sure.
|
 |
|
More of a "white" chrome effect can be achieved
under the Layers Pallet. Choose Satin with the color changed to
#D5C699 and the blending mode set at Screen.
|
 |
|
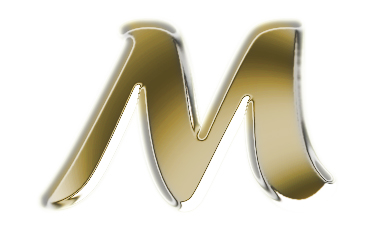
For some color, add the following: Inner Glow
with the default settings and Satin with Overlay as the blending
mode and #CC9900 as the color choice.
|
 |
|
An example with settings: Inner Shadow > Blend
Mode > Luminosity, Inner Glow > Blend Mode > Overlay, Color
> #CC9900, Satin > Blend Mode > Screen > Opacity >
50%.
|
|
| 


